

Learn How to Use the Tuscan Leveling System When Installing Tile
Posted by TOA's Blog Team on May 23rd 2024
Are you familiar with the Tuscan Leveling System?
It's a terrific resource to use when you're installing tile.
If you aren't, you'll find this article helpful. And if you are, it will be a refresher.
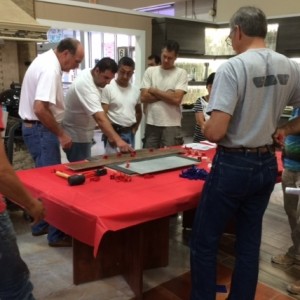
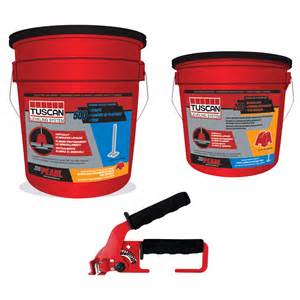
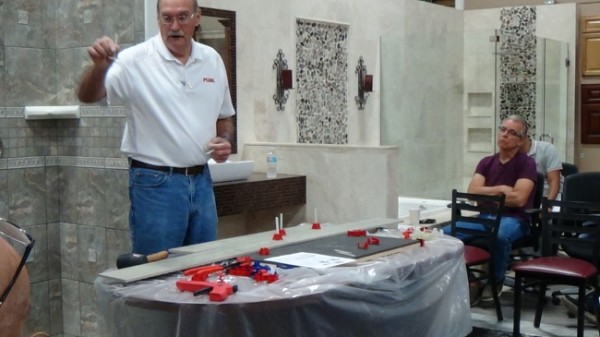
You see, the representative from Pearl Distributors showed us how to use the Tuscan Leveling System when installing tile. He demonstrated the one-piece Tuscan SeamClip and the two-piece Tuscan Leveling System.
As he explained, these systems represent valuable tools to make installing tile easier, especially with tiles becoming larger and more flexible, and ensure a lippage-free installation.
>> See Create a Lippage-free Tile Installation with the Tuscan Leveling System
Here are highlights from the presentation. We've included a 13:54-minute video from the demonstration at the end of the article.
Preparing the Tile Installation Surface is Critical!
Regardless of which leveling system you use, you must prepare the installation surface, whether it's a floor or a wall before you start installing tile.
If you don't prep the floor, no matter which system you use, you will have issues. Follow the tile installation recommendations from the Tile Council of North America (TCNA), as the National Tile Contractors Association (NTCA) and other tile industry associations recommend.
You will need a medium bed thinset and 1/2" notch trowel. The thinset should be on the loose side according to manufacturer recommendations. You don't want it to be thick because then you can't work with it.
Spread the thinset; you will want peaks just standing. Back-butter each tile.
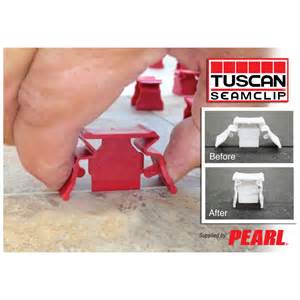
What is the Tuscan Seam Clip?
The Tuscan SeamClip is a unique one-piece system that clicks into place only using your hands. There are no tools required. Removal is easy, too, using a rubber mallet in the direction of the grout joint.
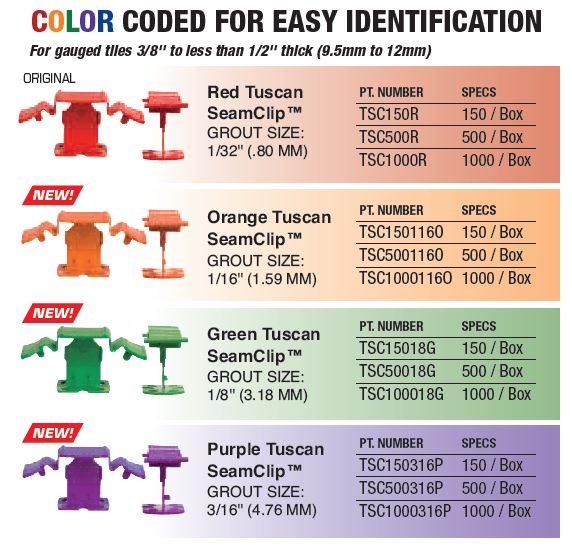
The SeamClips™ come in sizes based on the thickness of the tile you are setting:
- White for tiles 1/8” – ¼” thick
- Blue for tiles ¼” – 3/8” thick
- Red, Orange, Green, and Purple for tiles 3/8” – ½” thick
What's new is that Tuscan SeamClips are now pre-spaced to add grout joints during tile installation. More specifically, the four clips that can accommodate gauged tiles from 3/8" to 1/2" thick are conveniently color-coded for easy identification as follows:
- Red for 1/32" grout sizes
- Orange for 1/16" grout sizes
- Green for 1/8" grout sizes
- Purple for 3/16" grout sizes
1. How to Use the Tuscan SeamClip™
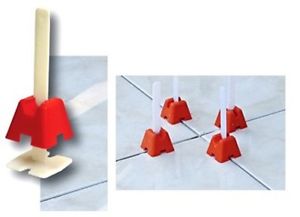
Place the first SeamClip at 1.5" to 2" from the corner/edge of the tile, then go every 6" to 10" depending on the bow in the tile. Position the next tile, then lock the clips into place. Notice that the lippage is gone.
Don't add any clips at any of the corners. These are the weakest points. Any pressure and the joints will pop.
The clip gives you a 1/32" grout joint. With a beveled tile, it looks like a 1/16" grout line. If you want to use a spacer to go wider, you can go up to 1/4" by adding spacers in between the SeamClips.
Come back the next day when the thinset is dry and everything has set. Take a mallet and use it in the direction of the grout joint to remove the clip. Note that no tiles will have sunk overnight.
- Do not kick the clips with a boot; the boot will likely have sand and scratch the tile.
- Don't break the clips against the grout joint; this will cause problems.
The SeamClip is not reusable. It is recyclable, though.
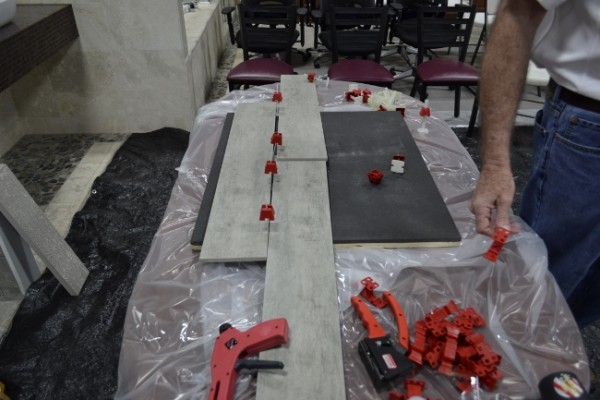
2. How to Use the Tuscan Leveling System®
The other system is the Tuscan Leveling System®. This system consists of caps, straps, and a tightening tool. It works with ceramic, porcelain, marble, onyx, granite, and most composites. Designed to work with tiles 12” or larger, it is most ideal for large format tiles including large, thin materials.
Have someone pre-assemble the caps and straps to make installation as easy as using the one-piece system.
Place the first cap and strap at 1.5" to 2" from the corner/edge of the tile, then go every 6" to 10" depending on the bow in the tile. Don't add any clips at any of the corners. As mentioned above, these are the weakest points. Any pressure and the joints will pop.
Position the next tile, then lock the caps and straps into place using the tool. You will also use the tool the next day to break the strap.
Notice that the lippage is gone.
The image below shows the cap and strap before it is tightened into place. As you can see, there is lippage.
In the next image, several caps have been tightened and the surface there is flat.
You can reuse the caps up to 150 times. The broken strap can be used as a shim. It is recyclable.
All of the Tuscan Leveling System products are made in the USA in Iowa with the exception of the tool which is made in Italy.
Additional Observations About Using the Tuscan Leveling Systems
The Tuscan Leveling System strap features a wing which makes the system ideal for transition areas. You can put two different thicknesses of tile side-by-side, lock them into place and they will be flat on top.
A few tips
At the end of the day if you haven't completed the job, take a margin trowel and clean out the area where you would position the clip. The next day, mix the thinset and place the clips and continue the job. Don't leave the clip in overnight.
The leveling systems work equally well for walls especially since no wall is perfectly flat. You can use either leveling system on ceilings; use a stainless steel screw in the slots to lock-in the cap.
The straps need to be soaked in hot water for at least an hour. The instructor recommended pre-assembling the straps and caps and soaking them together. They only need one soaking for improved elasticity.
Why use the Tuscan Leveling System?
The Tuscan Leveling System increases tile installation efficiency: no more stopping and lifting tiles to position them. It has enabled a two-man team to set 200 sq.ft/hour. One focuses on mixing the thinset and back-buttering, while the other sets the tile. It significantly reduces what needs to be done the day after you have set tile.
You can find guidelines on how to set up the Tuscan Leveling System for tile patterns.
Watch the 13:54-minute video titled How to Use the Tuscan Leveling System When Installing Tile.
Have you used the Tuscan SeamClip or the Tuscan Leveling System? What tips would you add?
Thanks for reading!

Note: This article was originally published on April 14, 2016, and has been updated.