

How To Create a Tile Backsplash Design Installation
Posted by TOA's Blog Team on Jan 18th 2024
Wondering how to create a tile backsplash design to install in your home?
At Tile Outlets of America, we've often created what we refer to as 'concept boards' to bring to life the many design possibilities you can create with tile and stone. In this article, using a concept board, we'll show you how to create a tile backsplash design installation.
Now, in this example, the concept board design could be used on the floor or a wall.
And, although we're installing it on 1/2" plywood, it's the same kind of thinking you would apply if you were creating a feature wall design in a bathroom or a backsplash in a kitchen. We’ll describe the creation of this display board as if it were a real tile installation.
>> See 4 Ways to Create Incredible Accent Walls With Tile
>> See Creating a Feature Wall with Tile: Inspiration from the Parade of Homes
Tile Outlets of America's Guide to Creating a Tile Backsplash Design
Step 1: Gather All of Your Tile Installation Tools and Materials
Before starting the project, gather all of the tools and materials you will need, including the tile. These are the tools and materials we recommend for this particular tile backsplash design project (also be sure to check out the Dream Sheet):
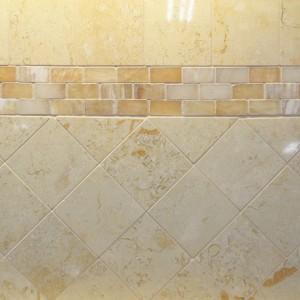
- A 1x2 Brick Mosaic of your choice
- A 4x4 tile of your choice (above we used honed Travertine)
- Modified thin-set
- Unsanded grout (color choice is based on personal preference)
- 1/16" spacers
- 1/4 x 1/4 x 1/4 square notched trowel
- Rubber grout float
- Margin trowel
- Two 5 gallon buckets
- A pencil or china marker
- Hammer/rubber mallet
- Carpenter's square
- Tape measure
- Razor knife
- Wet saw or angle grinder with tile cutting blade
- Sealer
- Sponges and rags
- Safety goggles
- Caulk and caulking gun
- Level
Step 2: Prepare Your Tile Installation Subsurface
It's critical to have your subsurface finished, clean and ready for your new tile installation.
For floor tile installations, your floor needs to be rigid and no less than 1 inch thick. If you plan to tile over concrete, be sure to inspect the slab for cracks and fractures.
You may need to install a crack suppression membrane prior to installing your tile.
>> See Why Underlayment Matters to a Tile Installation Project
Step 3: Create a Square Grid For Installing Your Tile Backsplash Design
Next, find the center of your floor (or wall or design).
To do this, simply measure from one wall to the opposite wall, mark the center and snap a chalk line.
Next, measure the other two walls and snap a chalk line.
You want your tile to be square when you start laying tile, so take your carpenter's square and check the point where your lines cross.
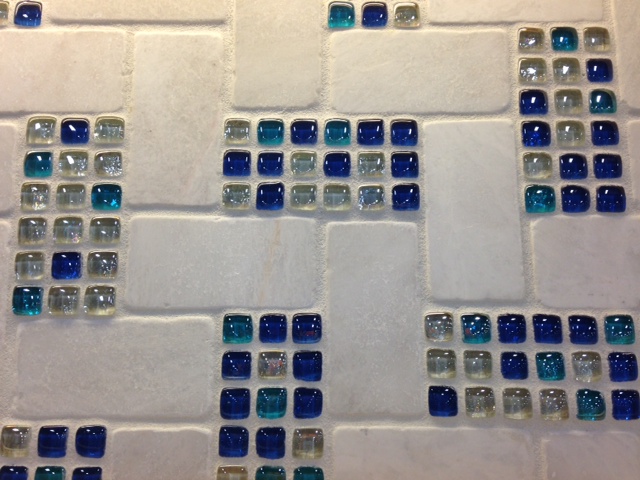
Add a touch of color to white marble tile or another white tile!
Step 4: Dry Install Your Tile Design
At this point, all you need to do is make a dry run with your tile.
Lay down a row of tile the entire length of each line is all you need. Don’t forget to leave some space between your tiles to simulate grout joints.
>> See Consider a Mockup for your Tile Installation Project
- The general idea is to work with as many full tiles as possible.
- Doing a test run this way will enable you to see if you need to make any adjustments to your layout before you’re committed to actually laying tile. (Cleaning wet tile and drying thin-set off of tile so you can reuse them is a messy job.)
- This is also the ideal time to decide whether you would like your tile to be a straight lay, lay on diagonal, off-set, etc.
>> If you need ideas, download our Tile Design Installation Patterns
Step 4: Start Installing Your Tile Backsplash Design!
Once that is complete you’ll be ready to start your tile installation.
Lay your first tile at the intersection of your lines. You can use the lines as a guide when you lay each quadrant. Always lay tile from the center out.
Before you set the tile, you’ll need to spread your thin-set. Do so using your notched trowel. Using the notched edge, hold the trowel at roughly a forty-five-degree angle to the floor and trowel the thin-set. This will create ridges and nearly bare spaces between them.
Lay the tile one at a time by pressing it firmly and evenly into the thin-set. Only mix as much thin-set as you feel that you can use in 10-20 minutes. The ‘open time’ or working time of thin-set before it starts to set up will vary by brand.
As you go, you'll need to check your tiles to make sure they are level. You can use a rubber mallet to gently tap any area that appears too high. We recommend that you use spacers between each tile to ensure even and professional-looking grout lines.
Remember you can’t walk on the tile for twenty-four hours after it’s laid so be sure to make cuts using your wet saw as you go and don’t forget to use your safety goggles. Carefully measure and mark your tile with a pencil or china marker. When cutting tile or stone, gently feed through the saw, don’t force it as this can cause unwanted breakage; let the saw do the work.
Do the quadrant by the door last.
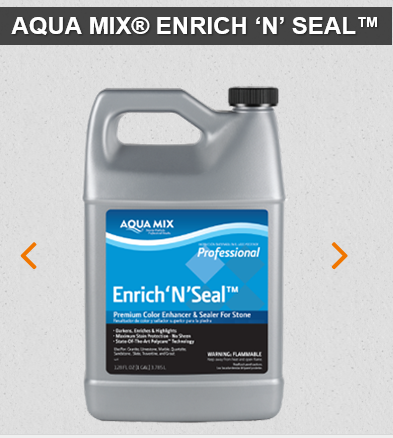
Step 5: Seal Your Tile Design Installation Project
Twenty-four hours after all of your tile has been set you may seal your floor if you are laying stone.
We recommend that you seal your stone before and after grouting.
When sealing stone it is important to remember that less is more. Don’t soak your entire floor with sealer all at once. Just like grouting, work in small manageable areas. You can pour sealer directly on the floor and spread it around, or pour sealer on a cloth rag and wipe it on. Allow the stone to absorb the sealer - this usually takes around five minutes - then wipe the stone clean with a dry rag or towel.
If you are using porcelain or ceramic tile, you are ready to start grouting. For this, you will need two buckets, margin trowel or paddle mixer and drill, grout float, sponges and rags.
- Fill both buckets with clean water. One to mix your grout and one for clean up. Mix your grout to a peanut butter-like consistency and let it set a few minutes.
- Then, using your margin trowel put several scoops of grout on the floor and spread it diagonally across your grout lines.
- Make sure that you are completely filling all of the grout joints. Unfilled grout joints could sink and crack at a later date.
- Work in small manageable areas; when you have completed an area, use a damp sponge to wipe the area down.
It doesn’t have to be perfect. The first rinse is just to get most of the grout off the tile itself. You’ll have to go back and rinse again and do a final clean up when you’re done.
>> See Ready to Seal Stone? Here are the Types of Stone Sealers Available
>> See How to Maintain Ceramic and Porcelain Tile and Grout With Aqua Mix Products.
Ready to Create Your Own Tile Backsplash Design Installation?
Let us know how to help!
You can find all of the installation materials you need at Tile Outlets of America not to mention the best selection of first-quality tile, stone, mosaics and more!
For other concept board ideas, check out:
>> How To Design With White Tile: Inspiration From Fort Myers
>> How to Create Tile Designs with Stone & Marble
We look forward to seeing you soon!

Note: We originally published this article on January 25, 2015, and have updated it.